Slicing…
with Photoshop
Although I’ve made this is a beginner’s tutorial for slicing up web pages, I threw in a few good tricks that I believe will give you an edge over many experienced slicers once you get the methods down.
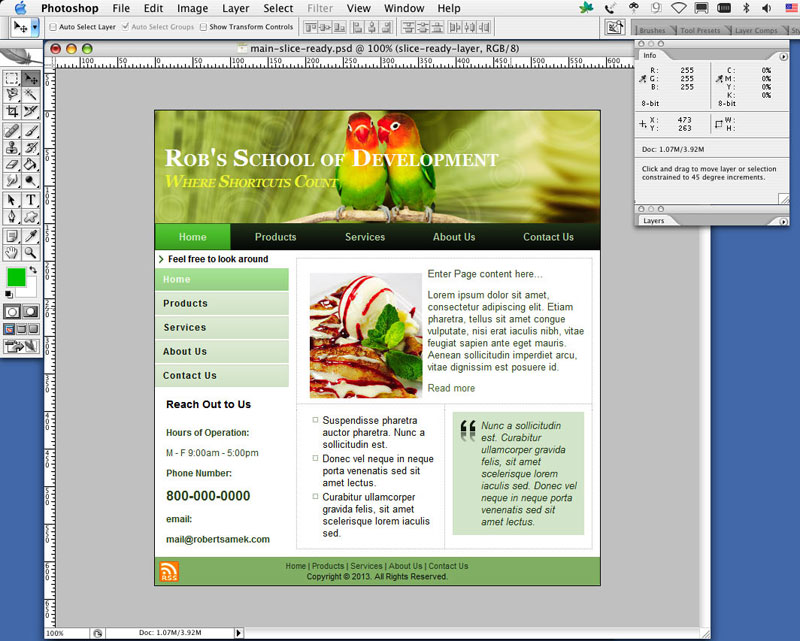
The image above is a quick mockup website I threw together solely for the purpose of this tutorial. It’s just shy of 600 pixels wide. I wanted to keep it rather small so that the screenshots would fit comfortably within the main body of my website.
The best methods for slicing depend on a couple considerations. The first being how the production artist created the file.
Sad to say, but sometimes in an agency the right hand doesn’t know what the left hand is doing. What I’m refering to specifically pertaining to image slicing is that Designers sometimes don’t understand how they can change their processes slightly to make things drasticly easier and quicker for Developers. This is where inter-departmental meetings are helpful. The questions that should be asked are “What can we do that will help one another and make the project easier all around?”.
As both a Designer and Developer, I’ve gained some helpful insights into what would make things easier at the development stage.
As this tutorial progresses, I’ll explain what I mean. Let’s get started. I made the screenshots as large as I could fit in the main body section of my site. If you’re having trouble making out any of the details, you can click on the image for an even slightly larger preview.
Step 1: Crop out any excess canvas area around your composition down to the pixel.
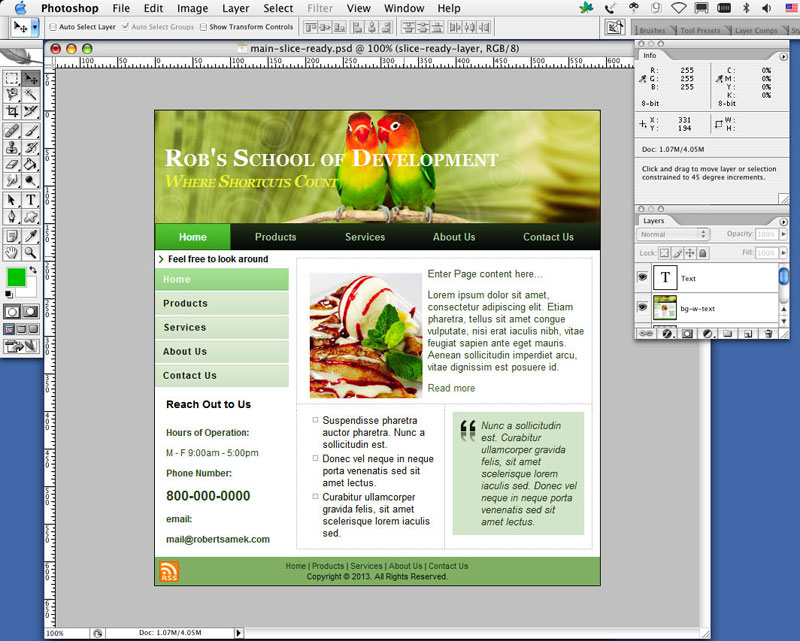
Step 2: Move all text to its own layer.
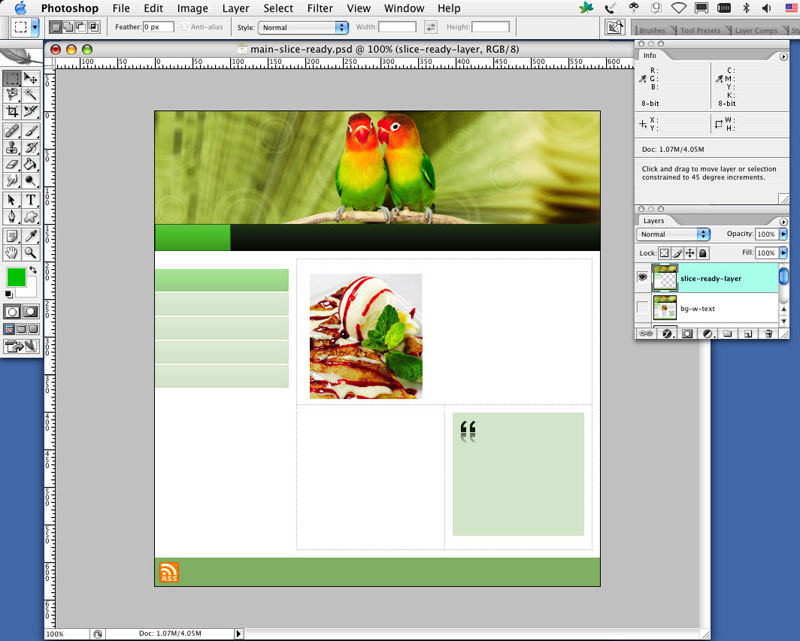
Step 3: Remove all non-essential images and borders within the main body area. Save them to their own layer for reference if you wish.

Step 4: Remove any clip-art, such as an RSS feed located at the bottom left of the footer. Save it to its own layer for reference if you wish.

Step 5: If the designer hasn’t already created the main elements on their own layers, it’s time to start cutting. We’ll begin with the header. You want to zoom in closely to insure you cut the image perfectly.
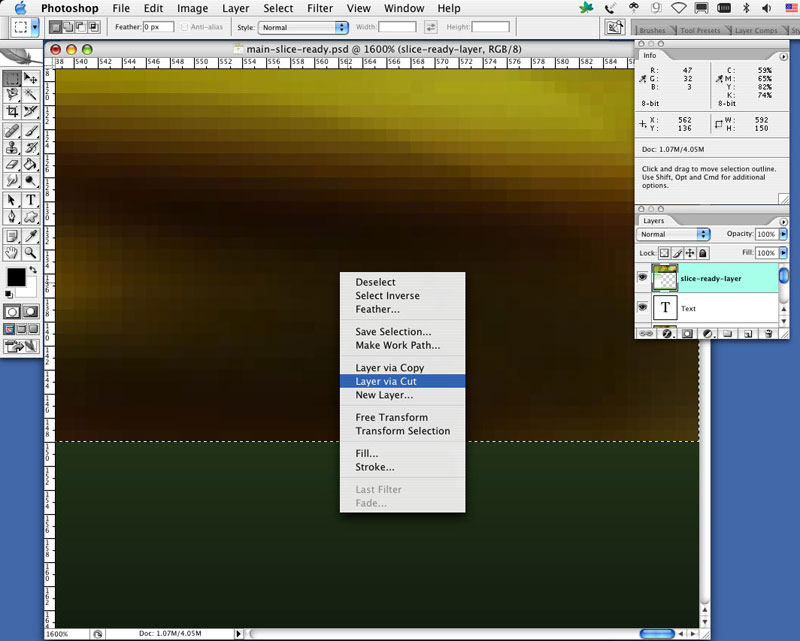
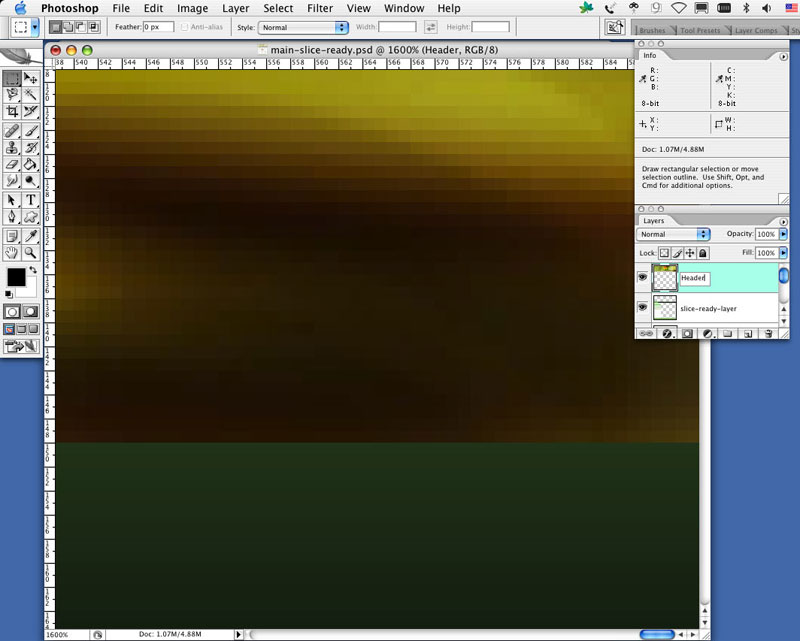
Step 6: Give the layer an appropriate name such as “Header” in this case.
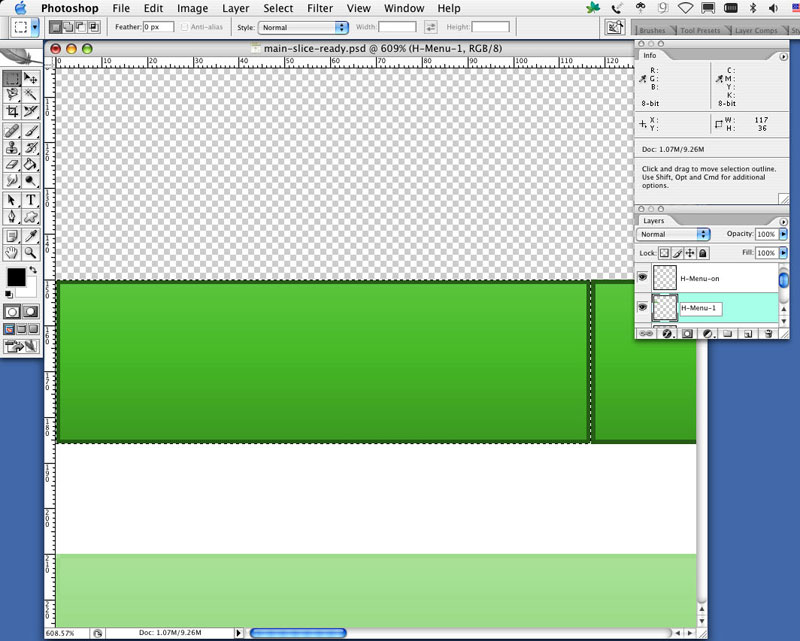
Step 7: Next we’ll take care of the Horizontal Navigation. We’ll need to create layers for each of the three menu states (on, off, hover). You really only need one slice for each, or even just a sliver of a slice for each, depending on the technique you employ. The sliver technique was more popular in the days of dial up connections when micro sized images were essential. For our purposes in this tutorial, we’ll just slice all menu selections for all states. You can also use CSS to create the same menu effect without images, but since this is a tutorial on slicing images, we’ll slice away.

Step 8: We’ll remove each menu button and place it on it’s own layer. If the designer created all of the elements on separate layers from the start, it saves the developer a significant amount of time. Give the layer an appropriate name such as “H-Menu-1″ in this case.
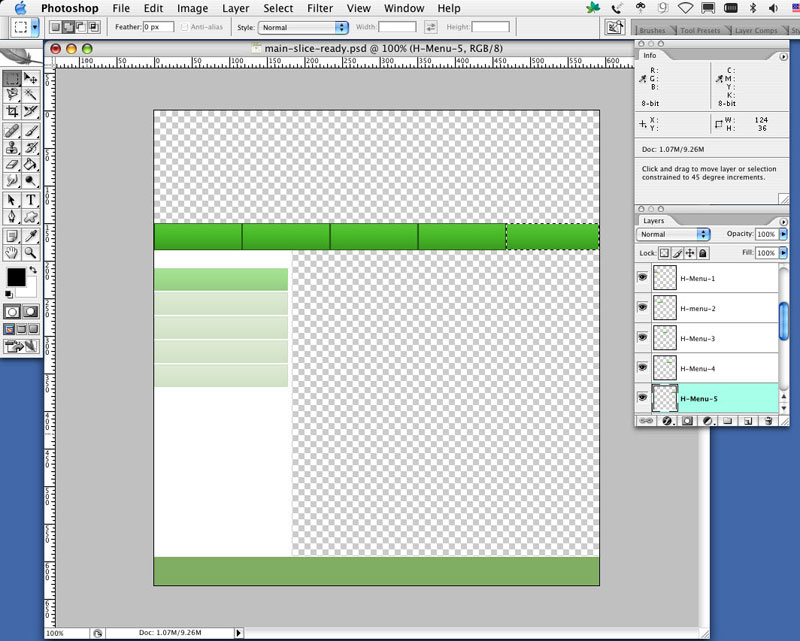
Step 9: Once you’ve cut all of the Horizontal menu images, line them up in an organized orderly fashion.
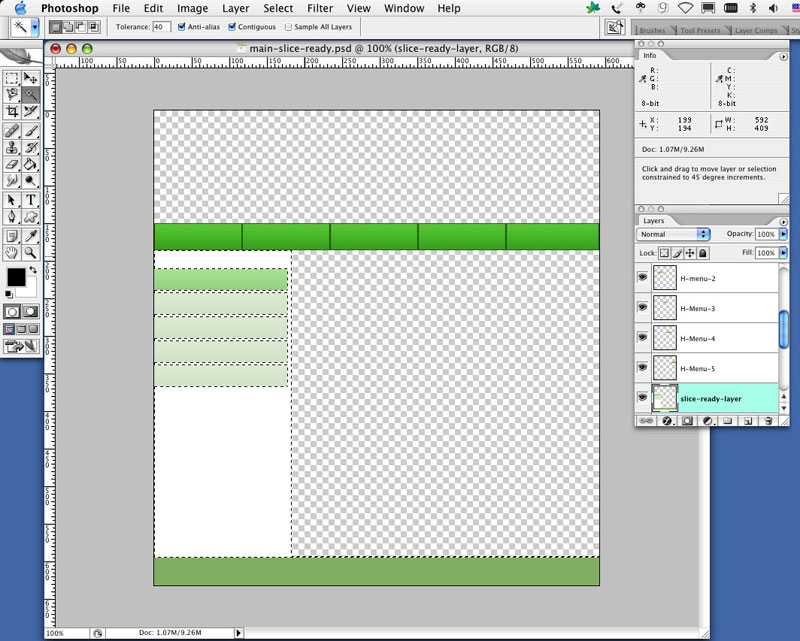
Step 10: Remove any extraneous white space from the remaining background. You can do this by selecting the magic wand tool and clicking on the white space area.
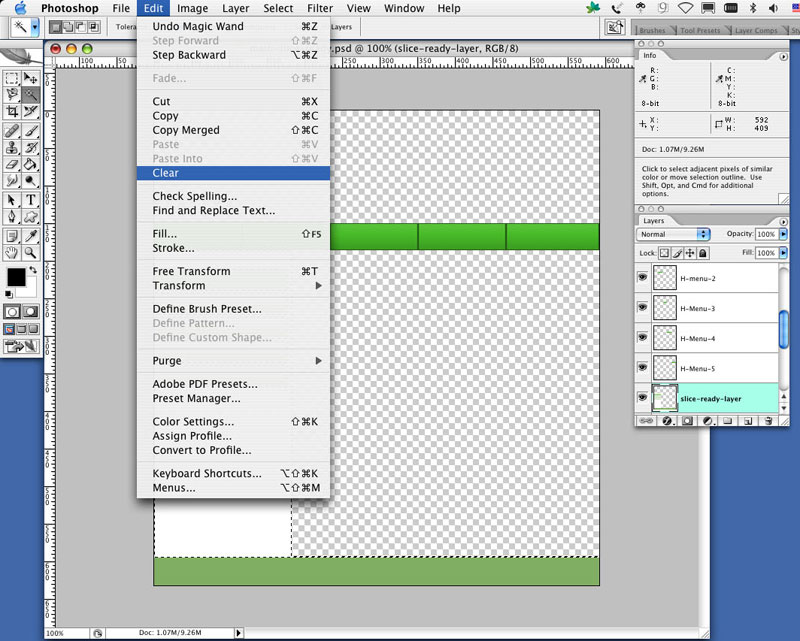
Step 11: Once you’ve selected the white space, select Edit > Clear from the main menu.
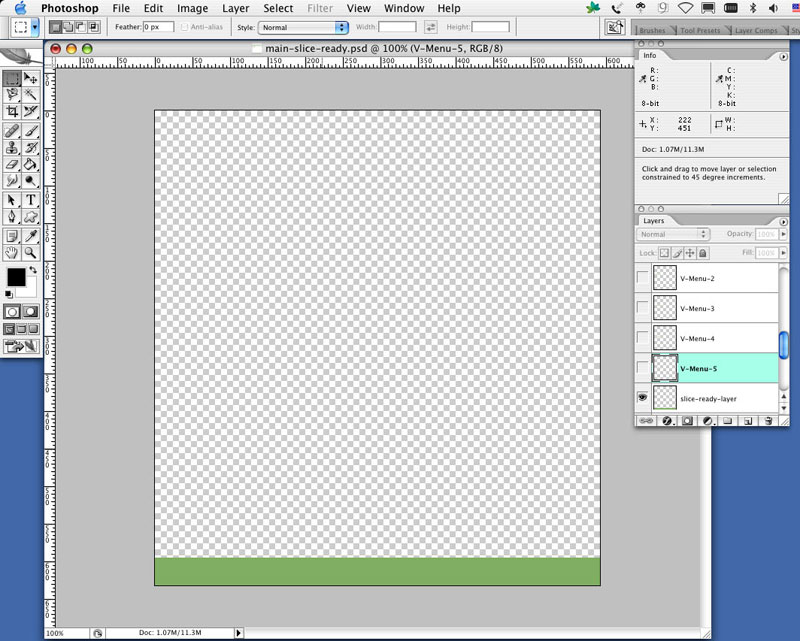
Step 12: For me, the cleanest way to proceed with the slicing for the Vertical Menu is to push all of the buttons up tight to the Horizontal menu. There’s no need to have extra white space slices. They can just confuse the developer when tweaking the HTML markup. For any of these slices, you can add all of the padding and spacing required in the markup itself. As with the Horizontal Menu, you’ll need to create Vertical Menus for all three states. For the sake of this tutorial, we’ll just slice "as is".

Step 13: Once you’ve cleared the white space, use the selection tool and the move tool to bump the buttons up as shown below.

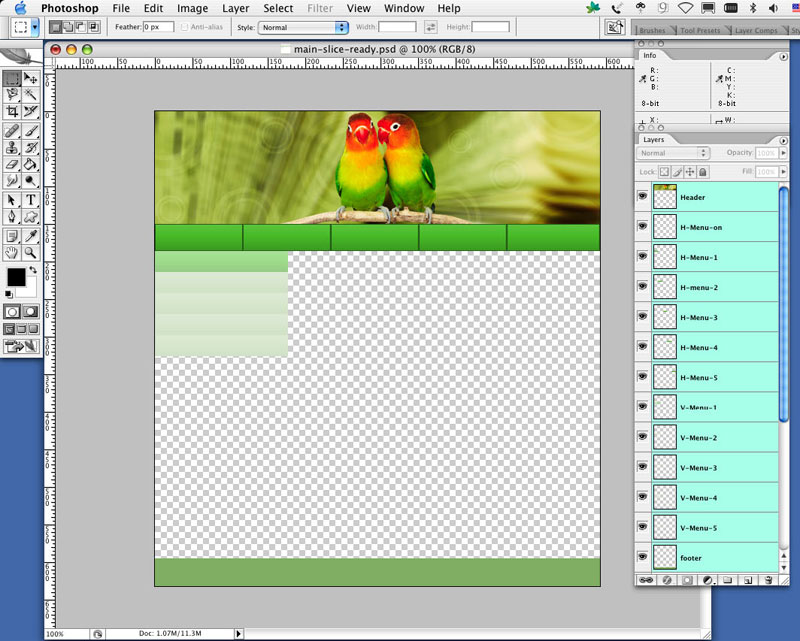
Step 14: All layers but the footer are now ready. Hide the visibility for all of the other layers to hide all of the images that are completed. Give the layer an appropriate name such as “footer” in this case.
Step 15: Make all of the layers visible again and select them all in the layers pallet. Believe it or not, we’re almost done!
Step 16: Click on Layer in the main menu and select "New Layer Based Slices".
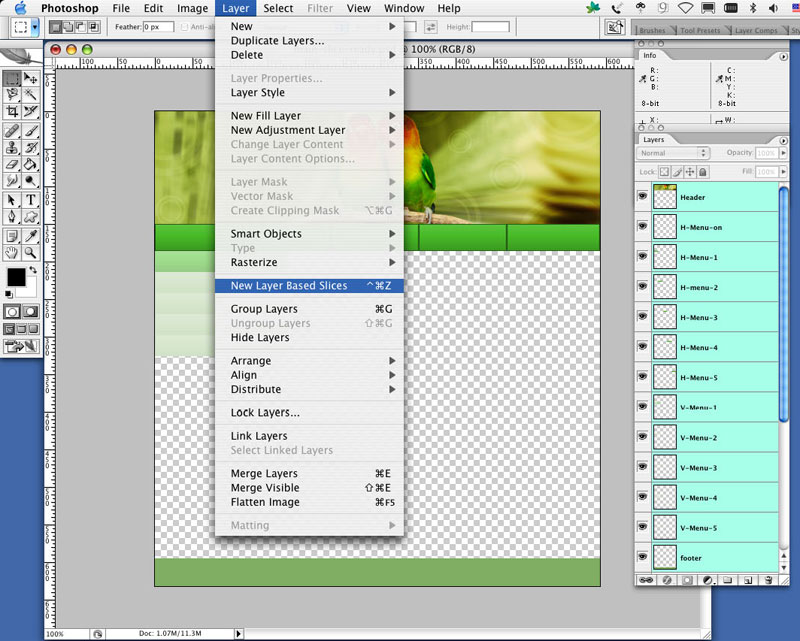
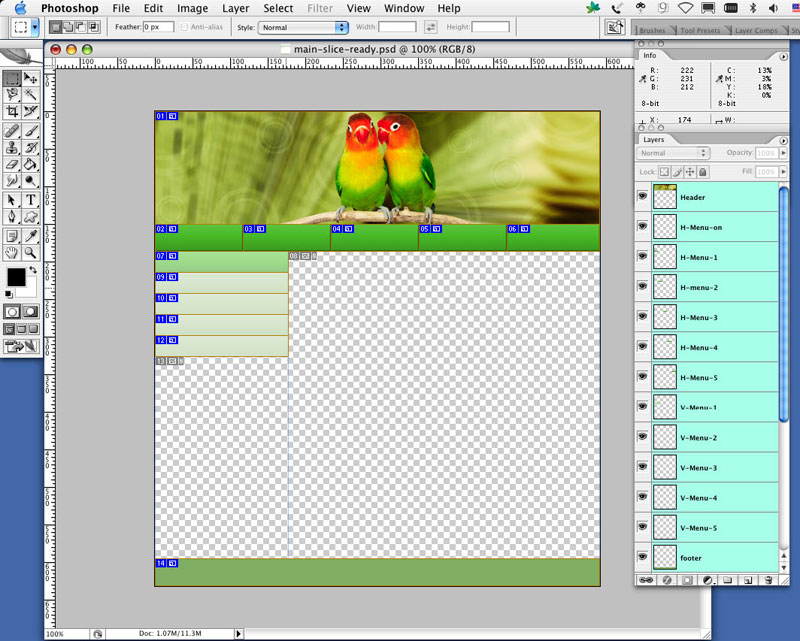
Step 17: Voila! You’ve just created all of your slices in a flash rather than having to slice each image with the slice tool. Pretty cool eh? Now just imagine if the Designer created all of the elements on their own layers. You’d only have a few short steps ’til markup.
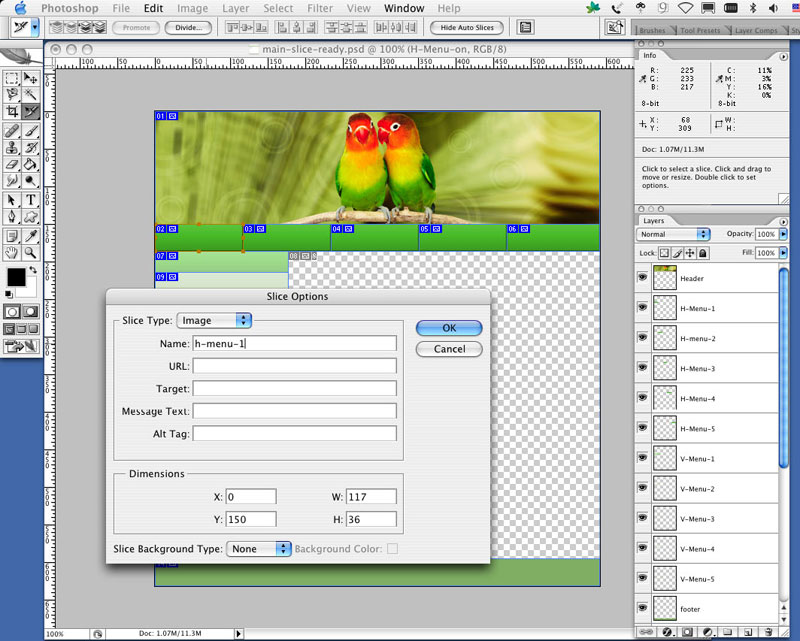
Step 18: Select the slice tool > Right click over the image and select "Promote User Slices" as shown below.

Step 19: Double click on each slice to open the slice options.
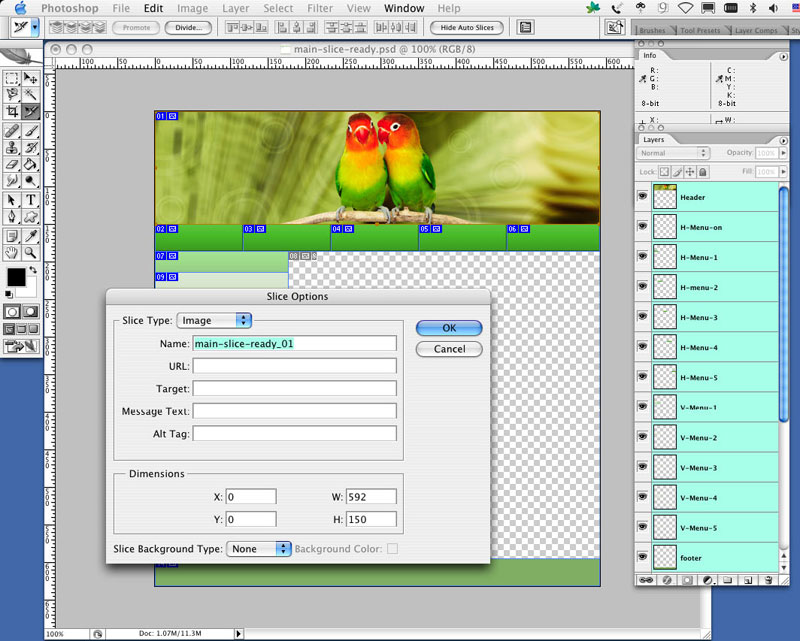
Step 20: The Name field contains the name Photoshop gives the actual completed web-ready image. Name it appropriately as shown below.
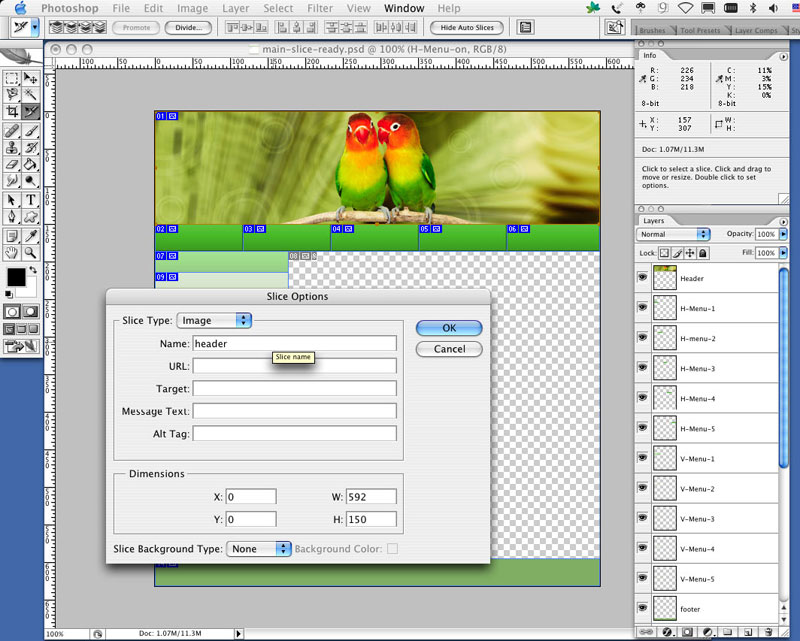
Step 21: Name the other slices appropriately.
Step 22: Click on File in the main menu and select "Save for Web ".

Step 23: Your now in the image optimization screen.
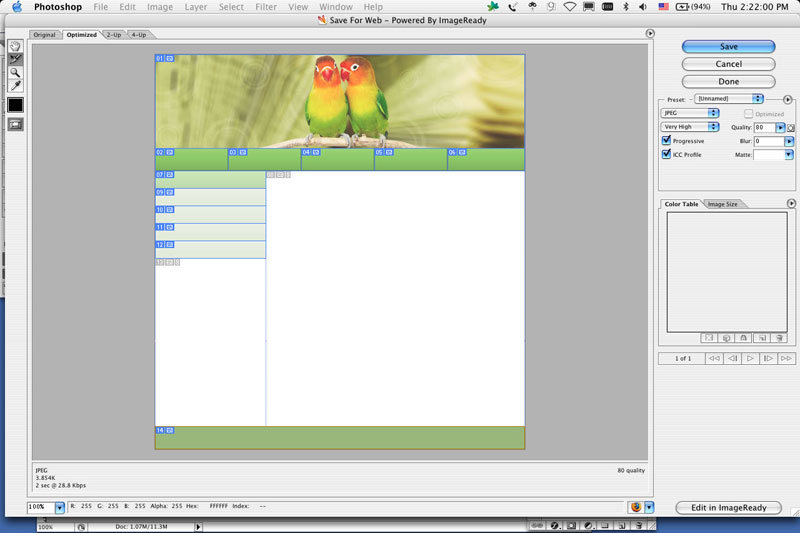
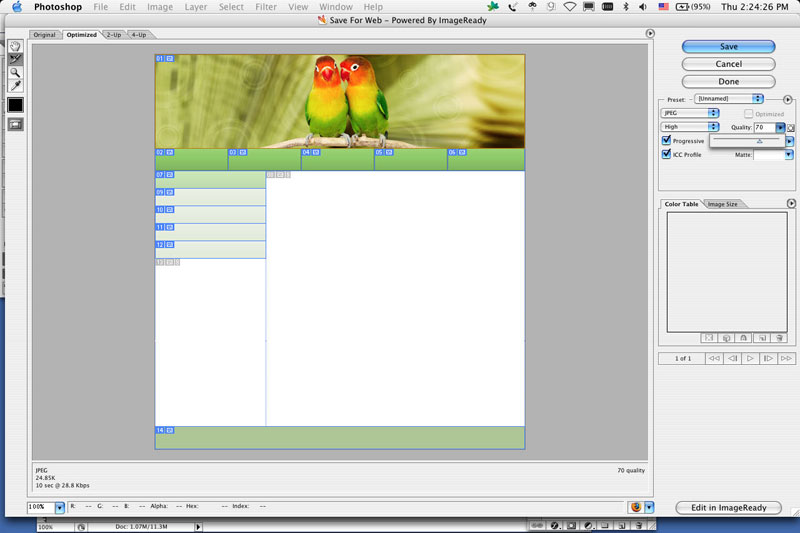
Step 24: If you click on the header image, the file size is shown in the bottom left hand corner. The header image is only 31k at 80% JPEG quality. If the file were significantly large, you could scale down the quality until you achieve the desired file size.
Step 25: If you click on one of the menu images, you’ll see that it’s only 4.54k. That’s extremely small, so no further optimization is needed. In this screen you can designate different file types such as png or gif for images that need transparency. It’s also good to change the image type to gif if you need to drastically reduce the file size and there aren’t many colors in the original image.

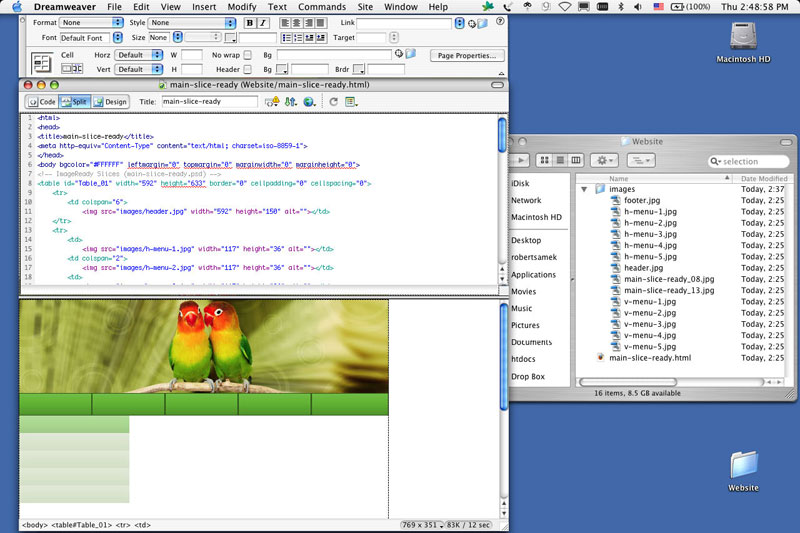
Step 26: Click on the "Save" button and make sure the format is changed to "HTML and Images"
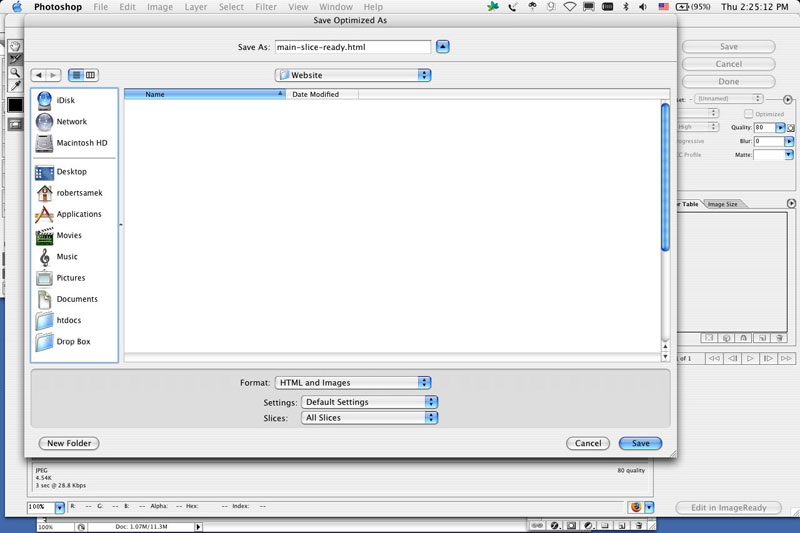
Step 27: Voila! Photoshop creates an HTML file, an image folder and places all of the images within it for you. Please feel free to email me with any questions you might have. Thanks for visiting my site and viewing my tutorial!